MicroPython #4: Interfacing Sensors
MicroPython
Interfacing Sensors
At the end of this, you will be able to interphase DHT11 Temperature Sensor with ESP 8266 NodeMCU bare-metal and also by attaching external LED's. The whole process will be done by MicroPython programming. So, Let's begin with !
Note: You must have your MicroPython firmware pre-flashed onto your board before beginning with this. If not, follow up these before getting back here.
Introduction to DHT 11 and Sensor Interphase
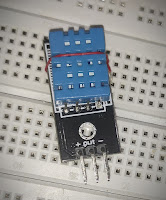
The DHT11 is a basic, ultra low-cost digital temperature and humidity sensor. It uses a capacitive humidity sensor and a thermistor to measure the surrounding air, and spits out a digital signal on the data pin. Here, we'll operate it on Analog mode.
There is a dht module that comes with the MicroPython firmware by default. So, it is easy to get temperature and humidity.
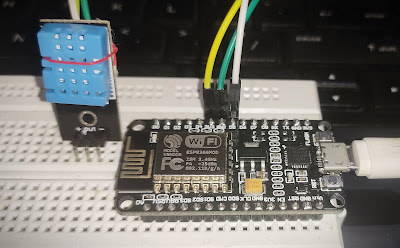
Implementation on ESP8266 (NodeMCU)
Using MicroPython Temperature data acquisition can be easily implemented and you will be able to read Temperature and Humidity data. Let's go through then !
The algorithm goes as follows :
> Import the Pin on the device to your program using 'from machine import Pin'.
> Call the time
With the help of time, you can turn LED on and off. Call time with 'from time import sleep' and 'sleep(<delay>)' is used to set delay later on.
> Now, Import the standard module for reading DHT sensor by 'import dht' and assign pin definition by 'dht.DHT11(PIN(14))'. DHT11/22 is an option and any ADC pin on bare-metal can be assigned for the same. (pin 14 here)
> Now, it's all about acquiring the data from dht. We have already imported and set all factors and made declarations. Call temperature as 'sensor.temperature()' and humidity as 'sensor.humidity()'
Putting these functions in while loop with try/except logic its all set to go.
Below is the MicroPython script for the same:
------------------------------
------------------------------
from machine import Pin
from time import sleep
import dht
sensor = dht.DHT11(Pin(14))
while True:
try:
sleep(2)
sensor.measure()
temp = print('Temp:',sensor.temperature(),'*C')
hum = print('Humi:',sensor.humidity(),'%')
except OSError as e:
print('Failed to read sensor.')
from time import sleep
import dht
sensor = dht.DHT11(Pin(14))
while True:
try:
sleep(2)
sensor.measure()
temp = print('Temp:',sensor.temperature(),'*C')
hum = print('Humi:',sensor.humidity(),'%')
except OSError as e:
print('Failed to read sensor.')
------------------------------
Get this written and run the script. There there !
You will find logging of Temperature and Humidity data on the terminal with the delay being set.
This can be upgraded to the next level by setting a temperature triggered Buzzer or LED. Add a statement saying 'if (temperature>38): machine.Pin(2, OUT)' saying to turn LED on a certain threshold. In the below image, the green LED indicates humidity is above 90% and red one says the temperature is above 37*C. That's something interesting !

Result and Display:
Summary: All of the above proves the power of MicroPython and shows its simplicity compared to C++ / Embedded C. Now, we have Sensor interphased. Why not we use this to control Thermostats, Switches, Multiple sensor integration,............and what not ??
Just drop down your comments, troubles or any bugs you found on the way in reaching so far in the comment section below.
GitHub link for source codes: https://github.com/NavadeepGaneshU/CL3VERTRONICS
Hope you followed up things tight.
Spark something
Cheers !!!
Cheers !!!


Comments
Post a Comment